No face. No gear. No experience. Just free tools and a proven formula pulling millions of views.
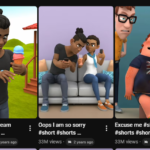
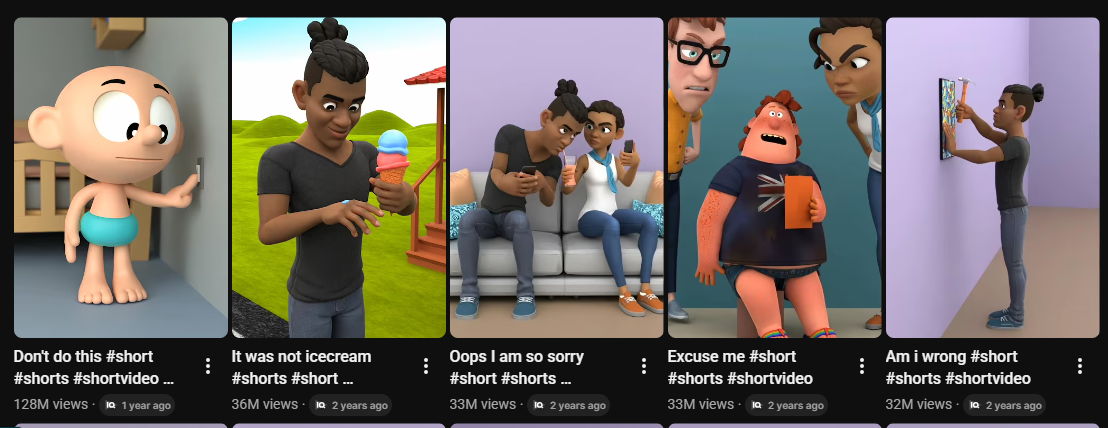
Right now, one of the fastest-growing content formats on YouTube, TikTok, and Instagram isn’t live-action vlogs or polished studio productions. It’s simple, funny, 2D cartoon-style animations — and the channels making them are pulling in 30 million, 60 million, even 126 million views on a single video.
The best part? You don’t need to be an artist. You don’t need expensive software. You don’t even need a camera. Everything in this guide is completely free, works on any basic laptop or PC, and requires zero design experience.
This guide breaks down the exact step-by-step system — from generating your video idea, to building characters, scripting, creating cartoon images, animating them, and editing the final video — all using free AI tools.
And at the end, I’ll reveal the one mistake that kills 90% of beginner cartoon channels before they ever get started. You don’t want to miss that.
Why 2D Cartoon Videos Are Blowing Up Right Now
Before jumping into the how, it’s worth understanding the why — because this isn’t a random trend. There’s a clear reason cartoon-style animation videos are dominating short-form platforms right now.
They hook attention instantly. Bright colors and character-driven storytelling stop the scroll within the first second.
They’re highly shareable. Funny, relatable scenarios travel across friend groups and family chats organically.
They require no face on camera. This removes the biggest barrier for most people: camera shyness.
They scale easily. Once you build your workflow, you can produce videos quickly and consistently — consistency is what grows channels.
Channels in this niche are sitting at 1.5 million subscribers with individual videos hitting 33 million, 36 million, and 126 million views. This is a proven pattern that keeps repeating. Let’s replicate it.
What You Need (Everything Is Free)
Here are the tools you’ll use throughout this process:
⦁ Claude AI (claude.ai) — for scripting, character design, storyboarding, and image/video prompts
⦁ ThankyouAI.com — for generating cartoon images and animating them into video clips
⦁ Flow AI (optional) — a second free tool for even more creative flexibility
⦁ CapCut — free video editor to assemble and export your final video
No paid subscriptions. No Photoshop. No drawing tablet. Just a laptop, an internet connection, and this guide.
Step 1: Generate Your Video Idea with the Right Prompt
The foundation of any viral cartoon video is the idea — and this is where most beginners waste hours staring at a blank screen. The fix is a custom-built prompt system designed specifically to generate cartoon video scripts in the same style as the channels getting millions of views.
Here’s how to use it:
- Get the prompt — Inside the Google Doc, you’ll find two prompts ready to copy.
- Copy Prompt 1 — select all the text and copy it.
- Open Claude AI at claude.ai — it’s completely free, no account required.
- Paste Prompt 1 into the message box and hit Enter.
In about 10 seconds, Claude will generate 10 complete video topic ideas — each one already built around the viral cartoon format, with a built-in story angle, a clear emotional hook, and a character situation that works perfectly for 2D animation.

Step 2: Build Your Script and Characters with Claude AI
Now it’s time to turn your chosen topic idea into a full script and storyboard. This is where the magic happens — and Claude does almost all the work for you.
Using Prompt 2
- Go back to the Google Doc and copy Prompt 2.
- Important: Don’t paste it directly into Claude. Open a brand new blank Google Doc (File > New > New Document).
- Paste Prompt 2 into the blank Google Doc.
- Find the line with [paste your topic here] and replace it with your chosen topic idea from Step 1.
- Select all, copy, go back to Claude AI, paste into the message box, and hit Enter.
Designing Your Characters
Here’s where it gets interactive. Claude won’t immediately generate the script — it will first ask you questions about your two main characters. This is what makes your video unique instead of looking generic.
For each character, Claude will ask about:
⦁ Skin tone (e.g., “medium brown”, “light”, “dark brown”)
⦁ Body type — describe it naturally
⦁ Outfit — what are they wearing?
⦁ Hair — style and color
⦁ Any custom details you want to add
Pro tip: When answering, copy each question Claude asks, paste it back into the message box, and type your answer directly below it. This keeps Claude from getting confused about which question you’re answering.
Generating the Storyboard
Once you’ve answered all character questions, Claude will ask: “Should I generate the storyboard for you?” Type yes and hit Enter.
Claude will now produce a complete scene-by-scene storyboard for your entire video. For each scene you’ll receive the background setting and environment, the exact dialogue for each character, and sound effects — everything laid out and ready to follow. You don’t write a single word of the script yourself.
Next, Claude will ask: “Should I generate image prompts for you?” Type yes again. Claude will produce ready-made image prompts — one for each scene — that you’ll use in the next step to create your actual cartoon images.
Step 3: Create Your Cartoon Images with Thank you AI
Now it’s time to turn those image prompts into real cartoon visuals. Head to ThankyouAI.com — you’ll get free credits just for signing up, which is more than enough to complete your first video.
Settings Before You Generate
⦁ Set aspect ratio to 9:16 (vertical format — perfect for YouTube Shorts, TikTok, and Instagram Reels)
⦁ Set number of images to 2 so you get two options and can pick the best one
Choosing Your AI Model
ThankyouAI offers several models. The two best for this cartoon style are GPT Image 2 and the Nana Banana model. Nana Banana is particularly recommended for its consistently strong cartoon-style output.
The Most Important Step: Keeping Characters Consistent
This is where most beginners make a critical mistake. If you just paste a new image prompt and hit generate for each scene, your character will look completely different in every scene — different face, different outfit, different style. Your video will look broken and unprofessional.
Here’s the fix — the reference image method:
- Generate and download your first image.
- For image 2: click the + button next to the prompt box, upload image 1 as a reference. This tells the AI exactly what your character looks like.
- Paste prompt 2 from Claude AI, generate, and download.
- For image 3: delete the previous reference, upload image 2 as the new reference.
- Repeat this process for all 5 images — always using the most recent image as your reference.
This single technique is what separates amateur cartoon videos from professional-looking ones. Don’t skip it.
Step 4: Animate Your Images into Video Clips
With all your cartoon images ready, it’s time to bring them to life. Go back to Claude AI — after your images are confirmed, Claude will ask: “Should I generate video prompts for you?” Type yes. Claude will give you a video prompt for every single scene — one prompt per clip, telling the AI exactly how the scene should move and animate.
Generating Video Clips in ThankyouAI
- Go to ThankyouAI and click on Video Generation.
- Set aspect ratio to 9:16 and duration to 4 seconds per clip.
- Paste video prompt 1 from Claude AI.
- Upload your first cartoon image as the reference.
- Select your video generation model and hit Generate.
- Preview, download, and repeat for every remaining scene.
Why 4 seconds? It’s the sweet spot. Long enough to show the scene clearly, short enough to keep the video moving at a fast, engaging pace that holds viewer attention.
Alternative: Flow AI
Flow AI is a second free tool that gives you more creative flexibility. Go to Flow AI, click New Project, set aspect ratio to 9:16, and select the Nano Banana model for consistent cartoon-style results. The process is the same: paste your image prompt, upload your reference image, generate. For video, switch to Video mode in settings, drag and drop your image, paste the video prompt from Claude AI, and hit Generate. Having two tools gives you options depending on the style you want.
Step 5: Edit and Export Your Final Video with CapCut
CapCut is free, simple, and perfect for this style of content. Here’s how to assemble your final video:
- Open CapCut and click Import. Bring in all your downloaded video clips.
- Drag them onto the timeline in order — scene 1, scene 2, scene 3, all the way through.
- Trim the beginning or end of any clip that needs adjustment by dragging the edges on the timeline.
- Add transitions between each scene. Pick one style and stay consistent throughout — don’t mix different transition styles.
- Hit Export. Your finished cartoon video saves directly to your device, ready to upload.
The #1 Mistake That Kills 90% of Beginner Cartoon Channels
You now have the complete system. But before you hit publish, there’s one critical mistake you need to avoid — and it’s not what most people think.
The mistake isn’t bad quality. It isn’t the wrong topic. It isn’t even poor editing. The number one mistake that kills beginner cartoon channels is: uploading one video and quitting.
Almost every channel that blows up does so after posting consistently — not after one viral video. The algorithm rewards channels that post regularly. Your first video might get 200 views. Your fifth might get 20,000. Your tenth could get 2 million. But you’ll never get there if you stop after video one.
The system you just learned is designed to be repeatable. Claude generates the ideas. Claude writes the script. Claude creates the image and video prompts. You’re not starting from scratch every time — you’re following a proven workflow. Use it consistently.
Where to Upload Your Cartoon Video
One piece of content, three platforms. Upload your finished video to all three:
⦁ YouTube Shorts — great for long-term discoverability and monetization potential
⦁ TikTok — highest viral velocity for new creators; the algorithm actively surfaces unknown accounts
⦁ Instagram Reels — strong for sharing and community growth
The 9:16 vertical format you’ve been using throughout this guide is the native format for all three platforms. No reformatting needed. One export, three uploads.
Complete Workflow Summary
- Use the custom prompt (linked below) in Claude AI to generate 10 video topic ideas
- Use Prompt 2 with your chosen topic in Claude AI to design characters and generate a full storyboard
- Have Claude generate image prompts for every scene
- Create cartoon images in ThankyouAI using the reference image method to keep characters consistent
- Have Claude generate video prompts for every scene
- Animate each image into a 4-second video clip in ThankyouAI (or Flow AI)
- Assemble, add transitions, and export in CapCut
- Upload to YouTube Shorts, TikTok, and Instagram Reels
Ready to Make Your First Cartoon Video?
You now have the exact system that top cartoon channels are using to rack up millions of views. No drawing. No expensive software. No experience required. Just free tools and a repeatable workflow.